How to Make Cheese
Most of us buy cheese in the store—but have you ever wondered if you could make it yourself, without any special types of equipment? Well, you can! And the following will explain.
The recipe for the first cheese I made, I got from a recipe booklet in a Junket Rennet box. The first thing to do is to buy some junket rennet. This can be found among the baking accessories in a major supermarket, or in a health food store. Cheese rennet will not work satisfactorily, unless you know how much more concentrated it is than Junket Rennet, and can modify the amount accordingly. And make sure you have milk, buttermilk, and salt on hand; cream would be nice, although I didn’t use it. Next you should probably decide on how much cheese you want in return. The recipe I will give makes a cup, but if you’re going to take the time to make it, you may as well increase the recipe.
As soon as you have the ingredients listed, you are ready to start; but read through the directions first, so you know when to be around. And, preferably, don’t start in the morning unless you plan to be up really late.
To begin with, dissolve 1/16 of a rennet tablet in 1/8 cup tepid water and set mixture aside. In a large saucepan, heat one quart of skim milk to 70 degrees F., watching it constantly. Remove the pan from the heat source, and stir in the Rennet Tablet solution and the buttermilk, mixing it well. Cover the pan with a towel or plate and let it stand at room temperature 12 to 18 hours until a firm curd has formed. If you keep your house cool at night, you may need to leave it longer. When the curd is firm, it will hold its shape and have sharply (more orless) defined edges when a sample is removed from the edges of a saucepan with a spoon. The next step is to cut the curd into 1/2 inch long pieces with a long knife. Heat the curd slowly over hot water until its temperature reaches 110 degrees F. (If you don’t have a double boiler large enough, this set-up can be obtained by nesting a pot large enough to hold the amount of milk you are using, in a pot a little deeper and 2 inches in diameter wider, and then filling the space in between the pots with water.) Hold the curd at this temperature for 20 to 30 minutes, stirring it at 5 minutes intervals to heat the curd uniformly. Then, pour the mixture onto a loosely woven piece of cloth laid out in a colander and allow the whey to drain into a bowl. After the whey has drained 2 to 3 minutes, lift the edges of the cloth and immerse the curd in a container of cold water 1 to 2 minutes, gently stirring and pressing with a spoon. When this time is up, immerse it in ice water 1 to 2 minutes. Remove the curd from the water and drain it until it is free from whey, as the whey will make the cheese very sour. Invert the cloth into a bowl, dumping out the curd, and add 1/4 teaspoon salt. You may add cream or milk as well, but if milk is added, it would be advisable to eat the curds promptly. The rennet seems to act upon the milk, making sour whey. The curds could also be kept dry until shortly before use; this may extend their refrigerator life.
The recipe for the second type of cheese I made is probably one of the easiest around, and a good one to start with. However, due to the ingredients it may be more to build your enthusiasm and give you the main idea of how cheese is formed than anything else. All you need is some milk, a lemon, and a heat source.
To begin with, heat a cup of milk (or multiply the recipe as you desire) in a sauce pan and add a tablespoon of lemon juice.
Continue to heat the mixture until very small curds rise to the surface and until the whey is more yellowish than white. Then, remove your pan from the heat and pour its contents into a light-weight piece of fabric, stretched over a bowl. The whey will drain through into the bowl, leaving the cheese behind. If you desire a dry cheese, leave it to drain for an hour or two, suspended by a piece of string tied to a cabinet handle, or hung on a kitchen faucet. Otherwise, squeeze out the excess liquid, cool, and enjoy! I found this cheese good on wheat drop biscuits, hot from the oven, which were made with the whey. On cold bread, etc., it wasn’t notably good.
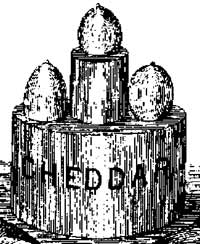
Perhaps by now you are getting a bit impatient; you thought you were going to be told how to make cheeses like those most commonly bought—Cheddar, Monterey, etc. Well, following is a description of my first experiment at hard cheese making; I will note where I erred, so that you may learn from my mistakes and not from your own.
arranged by placing one plate face down on a surface and placing the other plate on top, right side up. I piled five 1 1/2 inch-thick encyclopedias on top and left it for about an hour. I then removed the cheese from my homemade press, heated the whey I had saved to 180 degrees, placed the cheese in the whey, and left it until the whey had cooled to room temperature (15 hours or so). I took the cheese out of the whey and left it to drain in a colander for 20 hours. When that time had lapsed, it was ready to eat. Save the whey to use in breads in place of milk or water. It contains most of the minerals from the milk, and will not adversely affect the taste of your baked delights.
Notes: Another way to press the cheese is to return it to the colander after tying it, place a plate on the cheese, and put a gallon jugof water on the plate. Leave it overnight. You can then remove the cheese from the cloth, wrap it in a dry napkin, and place it in the refrigerator without putting it back in the whey or anything.
Happy Cheesemaking!